Most of the content of this blog is available in English and Spanish!
Showing posts with label Tutorials. Show all posts

Monday, September 27, 2010

About me and Awesome Inspiration

I know some of you have been asking what is happening to me! Oh well, I am getting ready to sell my house and move to US, so that's the reason I haven't been around for a while. I am almost done with all the things I need to do to advertise the house for sale so that means I will have bits of time to have some fun doing what I really LOVE to do, not painting, fixing, packing and stuff like that, lol!! Yes, if you need some fixings in your house I can go and help you, I am almost an expert by this time, lol!

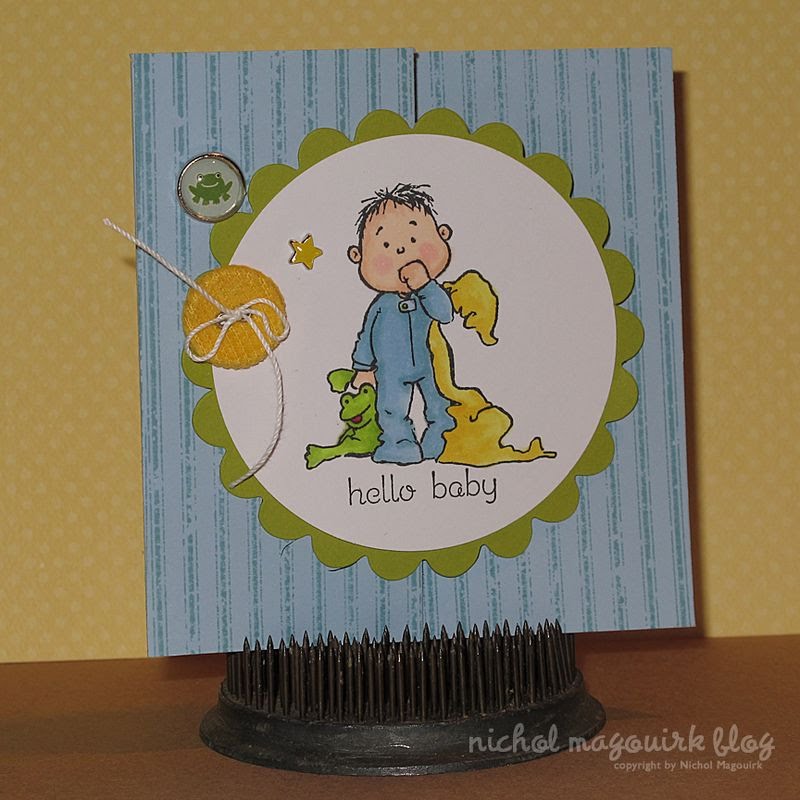
Anyway, since I have only been able to do a bit of stamping and coloring for a swap, that I can't share yet I have something that I am sure is going to inspire you!! Do you like this wonderful card you see here? It's Nichol Magouirk artwork and if you haven't visit her blog yet, this is the best time to do so. I admire Nichol's work and her personality, she is such an incredible girl, so talented and so sweet!! I will love to visit with her when I go to her state next year! that will be sooooo awesome!! but in the meantime enjoy her artwork and her videos, she is awesome doing videos and it's soooo natural, that you can stay all day watching her tutorials, go over there to see more! and let me know how do you like it, I know that I LOVE everything there, she is amazing!

*************************************************************************************

Se que muchas se andan preguntando que es de mi vida! Bueno pues les cuento que me estoy preparando para la venta de mi casa y mi mudanza a EU. Así que esa es la razón por la que he estado un poco perdida, jeje! Pero GAD todo va muy bien, lo único que sin tiempo para estar por aquí. Ya estoy casi lista para poner la casa a la venta, así que eso significa que tendré unos momentitos para hacer lo que realmente AMO! sii nada de pintar, reparar, empacar, y cosas por el estilo, jeje! Oh, si al menos ya estoy casi una experta en reparaciones del hogar, así que si me necesitan estoy disponible, jeje!

De todos modos, no he estado haciendo mucho (solo algunas tarjetas para un swap que aún no puedo compartir), pero de todos modos quería compartir una hermosa tarjeta hecha por la talentosísima Nichol Magouirk. Se que será de gran inspiración, pues su trabajo es super especTACular! Si aún no conoces su blog este es un buen momento para visitarla, el pasado viernes estuvo destacando unos sellos de TAC y tiene dos tarjetas con sus videos, sencillamente maravillosos, ella es super creativa y super dulce, me encantaría conocerla personalmente el próximo año cuando esté de visita en su estado! Se que te encantarán sus videos, tiene muchísimo arte y es super natural, me encanta eso de ella. Bueno no las entrentengo más para que puedan visitarla.

Love,

** Suscribe to my newsletter to get special promotions and tips only for my suscribers **

Friday, June 11, 2010

Tutorial at Scrapéalo!

As I told you yesterday my first tutorial and project for Scrapéalo it's here! You can go there to check more about it! I did a PDF document and a short, short video for it (I didn't find the Flip and my internal memory just have 1 minute for video, today I found the flip, DH bought a cover for it and he as a great organize guy put it inside of it as soon as he came home! I was looking outside of it, hey why you need to put in inside?, lol!

Hope you like my project!!!

What I used for this project: Branches in Bloom, Booko Blessings, Jewels Chalks, Versamark Dazzle, Crop-a-dile, Scallops Scissors

********************************************************************

Como les dije ayer mi primer tutorial y proyecto para el blog de Scrapéalo ya está aquí! Si quieres ver más sobre el proyecto ve aquí, preparé un documento en PDF y un corto, cortito video mostrando los pasos!(no encontré mi flip y la memoria interna de mi cámara es de sólo 1 minuto!!! luego encontré mi flip, es que mi esposo le compró un estuche y como un chico muy organizado la guardó dentro del estuche desde que llegamos a la casa, yo la estaba buscando fuera del estuche, para que guardarla, jeje!!)

Espero disfruten mi primer proyecto para Scrápealo!

Materiales que utiizé: Branches in Bloom, Booko Blessings, Tizas Jewels, Versamark Dazzle, Crop-a-dile, Tijera Scallop

Love,

** Suscribe to my newsletter to get special promotions and tips only for my suscribers **

Monday, July 20, 2009

Tall Boy Box Template and Tutorial

I am sooo sorry! I couldn't post the template for the Tall Boy Box yesterday since it was Sunday! and during Sunday I go to church and then have fun with the family until the evening and after the dinner I came to check my e-mail and the internet, but I was tired and without energy to come visit my blog, lol!

Anyhow here the template and the tutorial on how to do it, I hope you can try it!

What you need for the box:

Piece of cardstock 8½ x 9½ (I used Kraft), Scor Pal and Crop-a-dile.

Instructions:
1. Score the cardstock (9½ side) at 3, 4½, 7½ and 9.
2. Turn the cardstock (8½ side) at 1, 2½, 6½ and 8.
3. Cut as shown in the template.
4. Fold all the score lines.
5. Corner Rounder the flaps if you want
6. Decorate the box.
7. Glue the ½ inch tab and put it together. Do two holes with the Crop-a-dile at the top of the box.
8. Fill the box with Almond Joy (I created this box specifically for this ones) or
whatever you want.
9. Embellish as desired.
To decorate and embellished the box I used the Winchester Paper Collection, Brown Cardstock Strips, Spanish Sentiment Set and Neutral Twill.

DON'T forget the 25% off sale in the Discontinued Products TAC is having! Today I went to order some of my favorites cardstock and they WERE GONE!! So please hurry and get your stuff NOW! Go visit my store here under Discontinued products there is different categories, don't forget to check them all!

Lo siento mucho! Ayer no pude subir el "template" de la caja alta porque era domingo!!! y durante los domingos voy a la iglesia y luego con la familia. No es hasta después de la cena y recoger la cocina que vengo a ver mi e-mail y la internet, pero estaba tan cansada y sin energía para visitar mi blog, jeje!

De todas maneras aquí el "template y las instrucciones, espero lo puedas intentar!

Lo que necesitas para la caja:

Pedazo de cardstock 8½ x 9½ (En este caso azul), Scor Pal, Corner Rounder y Crop-a-dile.

Instrucciones:
1. Con la Scor Pal haz el “scoring” en el cardstock (del lado de 9½) a 3, 4½, 7½ y 9.
2. Gira el cardstock (ahora trabajaras en el lado de 8½) has el “scoring” a 1, 2½, 6½ y 8.
3. Corta según se ve en el template.
4. Dobla todas las lineas donde hiciste los “scoring”.
5. Con el Corner Rounder corta las aletas si deseas.
6. Decora la caja.
7. Pega la tableta de ½ pulgada para cerrar la caja. Has dos rotitos con la Crop-a-dile en el flap del tope de la caja (ver foto).
8. Llena la caja con dulces o utilízala para un regalo pequeño. Almond Joy (I created this box specifically for this ones) o lo que quieras.
9. Puedes añadir más embellishments si deseas.

NO olvides que la venta de los productos a descontinuar es hasta el 27 o mientras duren, hoy traté de ordenar algunos de mis cardstocks favoritos y ya NO quedaban, así que apresurate y ordena lo que quieres YA! Visita mi página aquí y busca los discontinued products, hay varias categorías, verificalas TODAS!!

Love,


** Suscribe to my newsletter to get special promotions and tips only for my suscribers **

Tuesday, May 05, 2009

Mini Purse Scallop Tutorial

Hey, Mother's Day is almost here! so if you need to dome quick and simple yet a cute gift! here is something you can try!

You need a 4 X 4 piece and 2 scalloped punches for each mini purse you need.

First: Score the scallops at 2. Stamp or embelish one of the scallops piece as you want.

Second: Score the 4 X 4 pieces at 1½ and 2½, turn the piece and score at 1 and 3. With this you are going to make a little box as you may see in the template!

Third: Add the scallops to the box and embellish more if desired.

Note: For the handle cut a little bit of cardstock and you can attach it with glue dots or brads, depends on what you are going to give inside of them!

Hope you like it and give it a try! this is super cute and very easy to do!! If you want to get the products for make this, you can go to my store to get them: Giga Scalloped Circle Punch, Scor Pal, Kraft Cardstock, Audrey Embelishment Jar, Angelee Paper Collection.

Love,
Diana

Saturday, February 14, 2009

Happy Day!! and a HOW to...

Hope you have a great day! I don't celebrate St. Valentine's day but I do celebrate Friendship and LOVE! so here is a lil something I did for my girls! I know it said Happy Valentine's day! sorry!! I didn't remember that I do have a stamp that said "Feliz Día de la Amistad" wich means Happy Friendship's Day!! (I just remember in this moment, ohhhhhhhhhhhhhhhhh, that happened when you have more stamps than what you really NEED!!, shhhhhhhhhhh, don't tell my DH!!, lol)

Well I hope you like my lil box! I did it just for this pretty cakes I found at the grocery store!! I couldn't resist them! I want to share my template with you! But I couldn't make it! so here I want to share the instructions and a picture so you can get the idea! I know you are not going to use this heart cakes and maybe you can't find them by now! but she (Little Debbie TM) have lots of fun cakes that I know will fit here! so start thinking on the next holiday! or a birthday goodie, or just a nice gift to someone special, or for a baby shower, or for whatever reason you want to use it and put a smile on someone face! I know my girls ENJOY it!

Here is how to: Little Heart Cake Box Template

You need an 8” X 7” piece of cardstock!

Then on your Scor Pal score (on the 8” side) at ½”, 3”, 4 ¼ ” here move your cardstock ¼ inch and score at 7” (the score should be at 6 ¾ but there is no line to score there).

On the other side (7”) the score have to be at 1 ¾ and 5 ¾ ” (here you need to move your cardstock and star at ¼ inch this way you score at 1 ½” and 6” because you don’t have a line to score at 1 ¾ and 5 ¾.

Then cut as you see on the second picture! And you are done with it. Pretty simple, but great box for those Little Debbie’s cakes!! Hope you enjoy it!

Love,
Diana

Friday, December 19, 2008

6 days 'til Christmas a LONG day!

OUCH!!! Today was a really LONG day! We went out today with the idea of pay the cell phone bill (the one with the company we used to be for more than 7 years! and that we didn't have any contract now! for my surprise when I tried to pay on the authomatic machine it said that my balance was more than $700 so I called customer service and they said that my contract was until 2009! wich I'm sure isn't so I wait for 2 hours to be attended for a cs representative! she reminds of us (long story) so she just added a note in the system (because our account was cancelled, we switch company) so she couldn't do more than that, then she put me on the phone with the Financial dept! and the adjust me the account (well I need to wait 2 biz day to be sure of this) wow more than 3 hours there!! so our shopping trip was reduced now he left almost 4 hours later because we need to have lunch! we headed to another town wich is about an hour to go shopping (some outlets stores) we finished the shopping time around 6:30 and we came back home!

I cooked something quick and started working here on my workshop I cut about 6 of this project but I'm so tired!! that I just put together this 3!! Hope you like it, there are post-it note holders!! I did them with the scor-pal.

How to?

With a 7½ x 3½ cardstock, score at 3½ and 4. Then embelished as desire! Easy peasy!! right?

I need to run, I'm sooooooooo TIRED, the problem with the cell phone company just took a lot of my energy, the lady at customer service through the phone was soooooo NASTY!! that I was sooo UPSET!! lol, now I just can laugh about it!! Have a great weekend!

Love,
Diana

Tuesday, December 09, 2008

Eight day of December!! Chipboard cube with Scor Pal

WOW!!! today is my birthday!! yeahhh! I enjoy a lot this day! specially when I just woke up to see my lil daughters standing there with the presents!! (I was spoiled with 2 outfits!!) and my DH gave me FLOWERS!! They are just awesome! Do I tell you before how much I love them? Well, in case you have missed it! I LOVE THEM SOOO MUCH!!

Well then when I got a chance to check my e-mail! wow!! there were a lot of Happy Birthday messages on my inbox!! I was sooooooo excited!! Thank you very much for your prayers, your wishes and all the great words you e-mailed me!! Thank you with all my heart!!

And since today is my birthday! I want to share with you a template/tutorial I did. The other day I did a search trying to get my hands on some wood blocks! but I have no luck! when I found them (I want them 2.5 inches) the shipping to Puerto Rico was SOOOOOOOOOO hight! that I was bummed! I want to do some cubes with pictures! but I thought it wasn't worthy! so I decided to do my own chipboard cubes, anyway I invest on my Scor Pal and that tool is soooo awesome that she is going to help me do what I want! and when you want something sooo bad, you can make it, right? At least if is something crafty, right? Here is what I did!


What you need to do a 2.5 chipboard cube?

First you need an 8½ X 11 piece of chipboard (I got mine here)
And the Scor Pal Follow the pictures and if you have any question just let me know!

Remember this can be great gifts for grandparents and you can add more pictures, more embelies, just as you like! I did it like this because I need to post it here!! asap!

Love,
Diana

Saturday, December 06, 2008

Sixth day of DECEMBER and a GC how to...

I'm not a big fan of Gift cards but since they are a good idea I just create this one from an 8½ X 11 cardstock (you can do 4 from an 8½ X 11 cardstock) is a quick and inexpensive idea right? and you can embelish as much as you desire and more personal. You don't have to use those standard that they comes with in some stores!

How to: (see pictures for details)

First cut a 4 1/4 X 5 1/2 cardstock (the same size as a card front, cut half and then half again). On the 5 1/2 side score at 1" and 3 1/2. On the 4 1/4 side score at 2/3 each side (see picture for details). Cut the side that you don't need. Ad red line tape to close the sides and embelish as desire!

Love,
Diana

Friday, December 05, 2008

Fifth Day of Christmas! and another how to...

I got 3 packages today, but I wasn't here!!!! Now I can't wait til tomorrow to go to the Postal Office to get them!! what that can be? Oh well I know that are scrapbooking stuff! but 2 boxes are from TAC! so I know that I have there my NEW PINK Bind IT All!! and some other cool stuff to play with!! Can't wait!! I have about 2-3 mini albums ready to go just waiting for the BIA to finish them!!

Do you remember about the 3 X 11 piece of cardstock that I have from yesterday chocolate pocket card? Well I just thought that I need to something with it (other than a mini card or a gift tag!) and this was what I did!! Do you like it? I enjoy doing it!! is just a quick idea for those moments when you need to do something quick and that you can use a lot!! I have the calendar pages to create some CD calendar! but I need to cut more for that! because those was the perfect size for this idea and I can keep it on my purse!! what fabulous idea!!

How to:

Score the 3 X 11 piece of cardstock at 2 1/2, 5, 7 1/2, 10 and 10 1/2
Print a 2009 calendar at your computer (size is 2 3/4 x 3
Then embelish as you desire!! and you're DONE!! I did mine like a purse and use the Reece paper because I have lots of scraps on my table!! so I need to use them or toss them so I prefer to used them! If you need more instructions please let me know, is really late and I'm tired, I will try to draw a template tomorrow!!

Have a great weekend!!

Love,
Diana

Wednesday, January 23, 2008

4th week challenge! Treats for Valentine

Hello! I am sad! LOL, there was no entries for this week, but since it was a Mini Album I am going to give you until January 31st to get your project in!! Is pretty easy give it a try! and if you have any question just let me know!

For today's challenge! I am going to keep in the LOVE LINE! and the projects I did for the TV Show! so you have the chance to work any of the project I did and you get a ticket for this months raffle!!

Mini Basket


Marshmallow Pies


Cut 2 Giga Scallops circles
Cut 1 Mega Scallop circle
Cut 1 Super Circle
Stamp the Super circle glue them together
and add one of the giga to the back of the pie with a double face tape
Glue the circle to the Mega and then to the scallop!
Attach this to the front of the pie with a double face tape, and you are done!!

Bag Toppers


This is the easier one! (I used a 3 X 3)
Get a bag with candies Cut a cardstock to fit your bag! (mine was 3 1/4 x 3)
Score it at 1.5" and embelish as desire! I used pattern paper and scallop punches stamp on it! and you are ready to go!

So hope to see a lot of entries for this one!!

Love,
Diana

Wednesday, January 16, 2008

3rd Week Challenge - Mini Album Tutorial

I can not beleive this is the 3rd week of the challenge! Thanks to all the ones that tried the box template and sent me your creations. I am going to be doing the slide show soon! so stay tune!

This week challenge comes with a tutorial, this is the project I did for our Online Escape in the Paper Wings forum (ANgels Only)! I hope you can give it a try so you can see how easy and quick is this gorgeous mini album! I used the Miss Moxie collection and I love it, is so brilliant! Hope you enjoy and if you have any question just let me know! Please share with us adding your link to the comments area or sending me the picture of your creation, HAVE FUN!!

What do you need?

Paper Collection with tags (SWIC works fine)at least 5 pp
Brads
Crop a dile
Stamps and Inks to coordinate
Something to score with, if you have the scor pal perfect!

Here is another samples done by my dear friend Rita Holmes!

Love,
Diana

Saturday, November 24, 2007

Coaster Mini Album tutorial - A simple and gorgeus Mini album!


What you need:

5 square coasters (I used 4")
6 square pieces of pattern paper (4")
Adjustable Drill Press* (Optional, but you can save time and get perfects holes!)
A ring, ribbons and embelisments.

What you should do:

1. Add glue to coasters and then add the paper pieces. You should glue one piece of paper to each coaster, except the cover coasters that should be cover both sides!

2. Add the photos to the remaining spaces (4 photos if you are working with 5 coasters!)

3. Embelish your album and cover.

4. Using the Adjustable drill press, or whatever tool you have on hand to do holes, make the holes to all coasters on the same place. I do so at the top left corner.

5. Add a ring and some ribbons if you like.

6. You have a perfect gift for any ocasion.

***This tool is awesome, I used it a lot, is worth the money. You can make a hole to lots of chipboards at the same time!! is just perfect! Plus if you buy $50 in products you can have it as ½ price item if you do so before Nov. 30 and you can get a Level A set too for FREE!!, contact me for details***

Tuesday, November 06, 2007

I owe you!!!


I know, I know, I was supossed to add the instructions for the inside of the Coaster mini album. But since this is one of the projects that is going to be feautured on my "All about gifts kit" I am going to share with you the steps, but not the complete tutorial or hints *wink, wink*


What you need:

12 squeare coasters (4" X 4")
Wide ribbon (about 20-24")
Paper collection with tags (I used three DC and 3 carstocks and some pieces)
Stamps and ink
Embelishments
Scallop scissors


First: follow Nichole's challenge insturctions for the cover

Second: cut 9 pieces of 4" X 8" cardstock and score them at 4"

Third: Glue the coasters to the cardstocks as this: fold 1st piece of paper at 4" then attach one coaster to each side, then attach other piece of paper to the coaster and so on, like doing a sandwich.

Fourth: When you have glue all the coaster to the DC pieces you can start working on your album (Maybe you prefer to do so before glue it, is optional) Remember to round the corners!! I did that with a scissor.

Fifth: When you are done with your album (I did it simple!! just some tags that comes with the collection, some square boxes for journaling, I stamped the lines from the Punctuation set, a lil bit of ribbon, a flower, stamps and more stamps!!) you can glue it to the cover. To do so, you have to put your album inside of the cover and look where is going to be better to place it (You can try to open it while you hold it together) it can not be at the cornes you have to do it aprox. 1/8 from the sides.

Sixth: Embelish your cover and you are DONE!!

If you need some clarifications, please send me an e-mail with your request.

Love,
Diana

PS This is not the collection that comes with the kit, the collection is Merry Wishes! so the pictures here are slightly different from the one on the kit.